What Happens During a Roof Replacement? Complete Step-by-Step Guide
What Are the Three Main Phases of Getting a New Roof?

Thinking of replacing your roof? Let’s walk through what actually happens. The whole process breaks down into three main phases: Before, During, and After. Each phase is equally important, and understanding all three will help you know exactly what to expect every step of the way.
Here’s what might surprise you: the actual installation (the “During” phase) is just a few days, but there’s a lot that happens before and after to make sure everything goes smoothly. Let’s dive into each phase so you know exactly what’s coming.
What Happens Before the Roofing Crew Shows Up?
Here’s something that surprises most folks: your roof replacement actually starts way before we show up with trucks and ladders. There’s about 4-6 weeks of planning first. This prep work is just as important as the installation day itself. Let’s break down what happens during this time.
1. Inspections and Estimates (Week 1-2)
First up, we need to get up there and really look at what’s going on. A good contractor won’t just eyeball your shingles from the driveway—we’re talking a full inspection. That means checking out your attic, looking at the wood underneath, and making sure your vents are doing their job.
When we give you an estimate, it’s going to be detailed—not scribbled on the back of a business card. You’ll see exactly what everything costs and what we’re planning to do. If someone gives you a vague “trust me” number, that’s your cue to keep shopping around.
2. Picking Your Contractor and Figuring Out Payment (Week 2-3)
Choosing who’s going to work on your roof is a big deal. Make sure they’re licensed, bonded, and insured. Don’t be shy about asking for proof—specifically Workers’ Comp insurance. Why? Because if someone gets hurt on your property and they don’t have it, guess who might be on the hook? Yeah, not fun.
This is also when you’ll want to nail down how you’re paying for everything. Roofs aren’t cheap—we won’t sugarcoat that. Whether you’re using savings, a home equity line, or looking into financing, get that sorted before you sign anything. Our Build Your Roof tool can help you plan out what you’re looking at cost-wise.
3. Getting Materials and Permits (Week 3-6)
Alright, contract’s signed—now we order your materials. We order early because you never know what’s going on with supply chains these days. While that’s happening, we’re also dealing with permits through your local building department. I know, paperwork isn’t exciting, but it’s important. Permits make sure everything we do meets code and keeps your home safe.
How Do I Get My House Ready for Roof Replacement?
In the days before we show up, there are a few things you can do to make everything go smoother. Look, we’re basically turning your house into a construction site for a few days. We’ll do our part to protect everything, but a little prep on your end makes a huge difference.
Your Night-Before Checklist
- Move your cars: We need room for our dumpster and delivery trucks. Park on the street or at a neighbor’s place the night before.
- Cover stuff in the attic: All that banging and vibration can shake loose dust and debris. Throw some tarps over anything you don’t want covered in dust.
- Take down wall hangings: Pictures, mirrors, anything hanging on your upstairs walls—take it down. Trust me, the vibration can knock stuff loose.
- Trim those branches: Any tree limbs hanging over the roof? Give them a trim. It keeps our crew safe and protects your trees from damage.
- Find a pet sitter: Nail guns are LOUD. If you’ve got dogs or cats, they’ll be much happier spending the day somewhere quiet.
Got more questions about getting ready? Check out our FAQ page—we’ve probably answered it there.
How Will My Property Be Protected During the Work?
Installation day! We usually roll up between 6:30 and 7:30 AM (yeah, we’re early birds). But before we start ripping anything off, the first order of business is protecting your property. Here’s what you should see:
- Plywood boards: We’ll put plywood over your AC unit, driveway, or any delicate plants. Stuff falls off roofs—we don’t want it landing on anything important.
- Heavy-duty tarps: These hang from your roofline and catch all the old shingles and nails as they come sliding down. Way better than having them land in your flower beds.
- Safety gear: Depending on how steep your roof is, we might set up safety railings. OSHA rules, but also just common sense.
What Happens When You Tear Off the Old Roof?
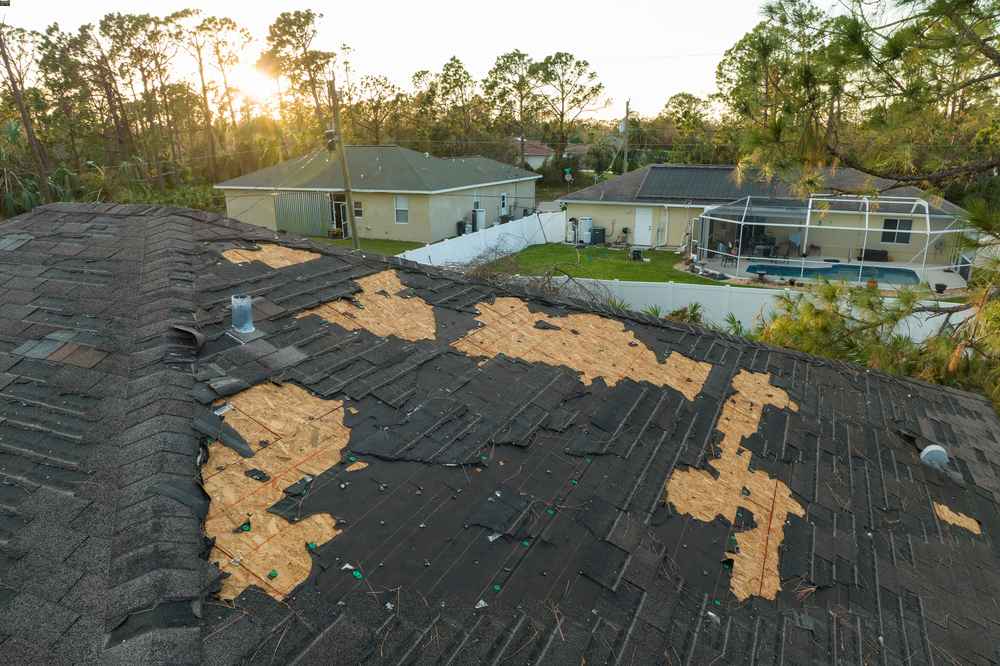
Okay, protection’s in place—time for the tear-off. This is the loudest, messiest part of the whole job. We’re taking everything down to the bare wood deck.
“Wait, why can’t you just put the new shingles over the old ones?” We get asked this a lot. Here’s the deal:
- Too much weight: Shingles are heavy. Doubling them up puts serious stress on your roof structure.
- Heat problems: Extra layers trap heat, which basically cooks your new shingles from underneath. Not exactly extending their life.
- Hidden damage: If we don’t pull everything off, we can’t see what’s wrong underneath. And trust me, you want to know.
The crew uses these special tear-off shovels (they’re like regular shovels but way cooler) to pry up shingles and pull nails at the same time. We usually work from the top down, pushing all the old stuff onto those tarps we set up earlier.
What If You Find Rotten Wood Under My Shingles?
Once all the old stuff is off, we get to see what’s really going on. The “decking”—that’s the plywood or OSB boards that form the base of your roof—this is where we find surprises (and not always good ones).
If we spot rotted wood, water damage, or gaps between boards bigger than 1/8 inch, we’ve got to replace it. Building code says so, but also, you can’t nail new shingles into rotten wood. First windstorm and they’re gone.
Here’s the honest truth: We can’t tell you exactly what the decking looks like until we peel back the old roof. That’s why we usually recommend setting aside a small chunk of your budget (maybe 5-10%) just in case we find bad wood. If we do, we’ll take pictures, show you what’s up, and get your approval before we fix it. No surprises, no “oh by the way” charges. This is just one part of our comprehensive residential roofing services.
What Goes On Before the Shingles? (The Waterproofing Layers)
Alright, the deck is solid and clean—now we start building your new roof. This is where the real waterproofing magic happens. Think of it like layers of defense protecting your house.
1. Drip Edge
First thing we put on is metal drip edge along the edges of your roof. This L-shaped metal kicks water away from your fascia (that board running along the edge) and into the gutters where it belongs. No drip edge? Water eventually rots that wood.
2. Ice and Water Shield
Next up is Ice and Water Shield. Don’t let the name fool you—this isn’t just for cold climates. It’s a self-sealing rubber membrane that we put in the valleys (where two slopes meet) and around anything that pokes through the roof, like pipes and chimneys. This stuff seals around nails, so even if water tries to sneak in, it can’t. It’s leak protection on steroids.
3. Synthetic Underlayment
Remember that old tar paper your grandpa’s roofer used? Yeah, we don’t use that anymore. Now we’ve got synthetic underlayment—it’s basically a tough, water-resistant fabric that covers your entire deck. It breathes (so moisture can escape) but keeps water out. This is your backup protection if anything ever gets under the shingles.
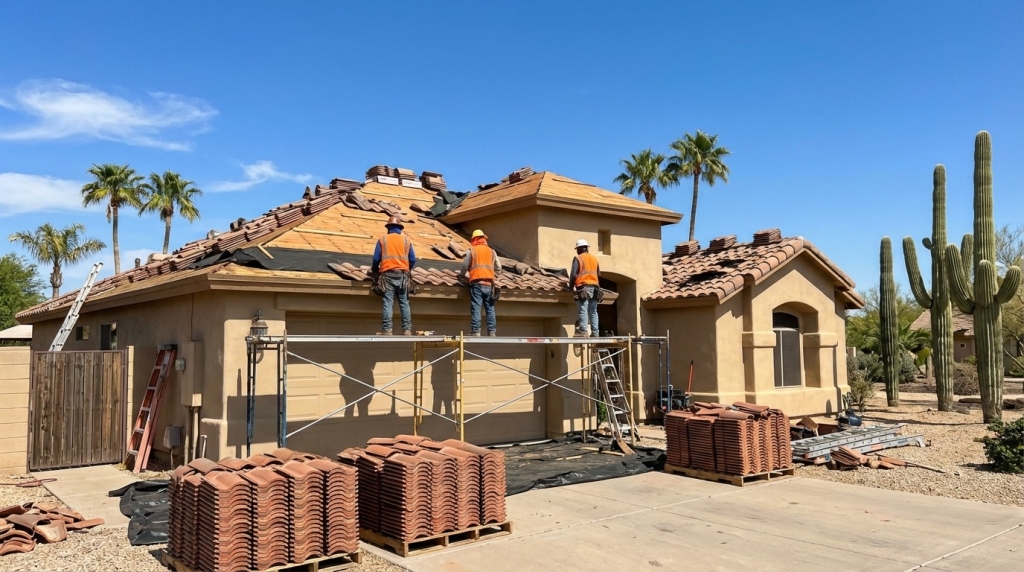
How Do You Actually Install the New Shingles?
Now for the fun part—putting on your new shingles. This isn’t just slapping them up there randomly. There’s actually a method to it, and doing it right makes all the difference.
Starter Shingles
We don’t start with regular shingles. First comes a special “starter strip” along the bottom edge. It’s got adhesive that seals down that first row and keeps wind from getting underneath. In windy areas, this is crucial—it’s what keeps your shingles from taking flight in the next big storm.
Field Shingles (The Main Event)
The regular shingles go on in a staggered pattern. Think of it like laying bricks—you don’t want all the seams lining up because that’s where water can sneak through. We nail each shingle with 4-6 nails depending on your roof’s pitch and how windy it gets around here. In really windy spots, we might use extra nails—better safe than sorry.
Ventilation
As we’re working, we’re also cutting in new vents or replacing old ones. Why? Because your attic needs to breathe. Without proper ventilation, heat gets trapped up there, cooking your shingles from underneath and jacking up your energy bills. We make sure air flows in through the soffit vents and out through the ridge or box vents. It’s all about balance.
Ridge Caps
Last but not least, we install ridge caps. These are thicker, bendable shingles that cover the peak of your roof. They give everything a finished look and seal up the very top of the system.
How Long Will My Roof Replacement Actually Take?
“So how long is my house going to be a construction zone?” Great question. Let’s break it down:
The actual work on your roof: For your average 2,000 square foot house with regular asphalt shingles, we’re talking 1 to 3 days. If your roof’s got a lot going on—steep slopes, multiple levels, skylights—it might take a bit longer.
The whole process start to finish: From your first call to us until we’re shaking hands on the completed job, it’s usually 4 to 8 weeks. That includes inspections, waiting on materials, dealing with insurance (if that’s part of the deal), and scheduling.
Things that might slow us down:
- Weather: We can’t work in rain or crazy wind. Safety first, plus wet shingles don’t seal right.
- Bad wood: If we find a bunch of rotten decking, that adds time (and cost, unfortunately).
- Complicated roofs: Skylights, chimneys, dormers—all that fancy flashing work takes time to do right.
What If I’m Using Insurance to Pay for My New Roof?
If a storm trashed your roof and you’re dealing with insurance, there are a few extra steps in the process. Here’s how it usually goes:
1. The Insurance Adjuster Visit: After you file your claim, an adjuster comes out to look at the damage. Pro tip: have your roofer there too. We know what to look for, and we can point out stuff the adjuster might miss. It can make a real difference in what gets covered.
2. The Scope of Loss: The insurance company gives you a list of what they’ll pay for. We’ll compare that against our estimate. If they missed things—like code upgrades or hidden damage—we file what’s called a “supplement” to get those covered.
3. The Check Situation: Insurance checks usually get made out to both you and your mortgage company. That means you need their signature before you can cash it, which can take some time. We’ve helped plenty of folks navigate this—it’s a pain, but we’ll walk you through it. For storm damage that needs immediate attention, check out our emergency roofing services.
What Happens After the New Roof Is On?
Alright, the hard part’s done. But we’re not finished yet.
The Cleanup
Our crew breaks out the industrial-strength magnets and sweeps your whole property—yard, driveway, flower beds, everywhere. We’re hunting for stray nails because the last thing you want is a flat tire or your kid stepping on one. We also blow off the roof, clean the gutters, and haul away all the debris.
The Final Walk-Through
Before we call it done, a supervisor walks the roof checking everything—flashing sealed? Shingles straight? Vents secure? Then we do a walkthrough with you. We want you to be happy with the work, and if something’s not right, we fix it. Simple as that.
Your Paperwork
You’ll get all your warranty documents. Put these somewhere safe—not in the junk drawer where they’ll disappear. Also, grab your phone and take some pictures of your new roof. If you ever need to file an insurance claim down the road, these photos show what condition your roof was in before whatever happened happened.
How Do I Make My New Roof Last as Long as Possible?
Your new roof’s an investment, and like any investment, it needs a little TLC to last. Here’s how to get your money’s worth:
- Clean those gutters: Clogged gutters back water up under the shingles, and that rots the wood underneath. Not good.
- Trim back trees: Keep branches at least 6-10 feet away from your roof. Rubbing branches wear down shingles, and trees make highways for critters to get on your roof.
- Get it checked annually: Have someone come look at your roof once a year, especially after big storms. Catching small problems early is way cheaper than fixing big leaks later.
Taking care of your roof isn’t complicated, but it makes a huge difference in how long it lasts. We’re talking the difference between 20 years and 30+ years. Want to see examples of our work? Browse our project gallery to see completed installations.
Ready to Give Your Home the Protection It Deserves?
Look, replacing a roof is a big deal. But with the right crew handling it, it doesn’t have to be a nightmare. At TSM Roofing, we’re all about keeping things straight with you—no surprises, no runaround, just honest work done right.
Don’t wait until you’ve got water dripping into your living room. Let’s get ahead of it with a free inspection and a no-nonsense estimate.